
示例地址:https://zentao.demo.qucheng.cc/index.php?m=user&f=login&referer=Lw==
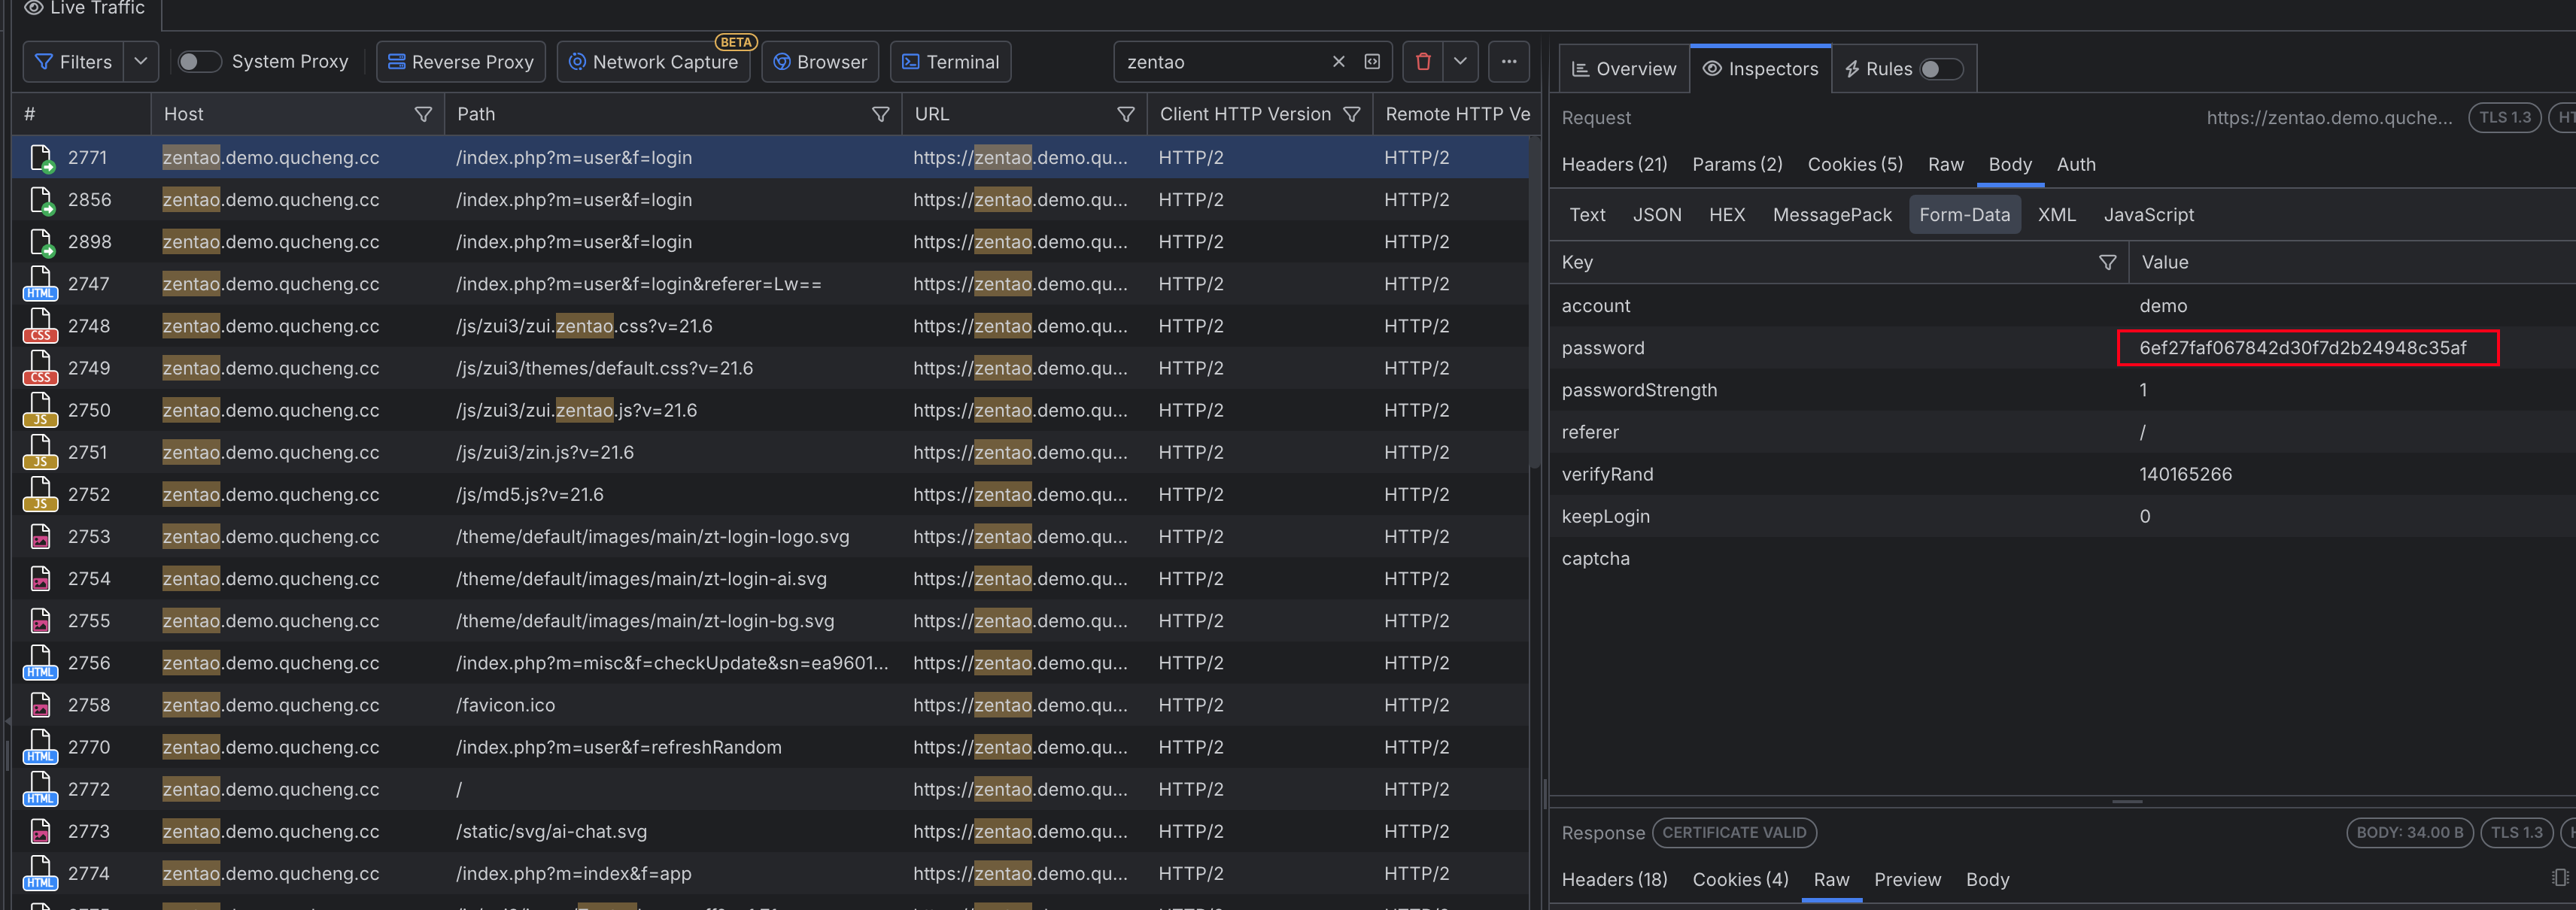
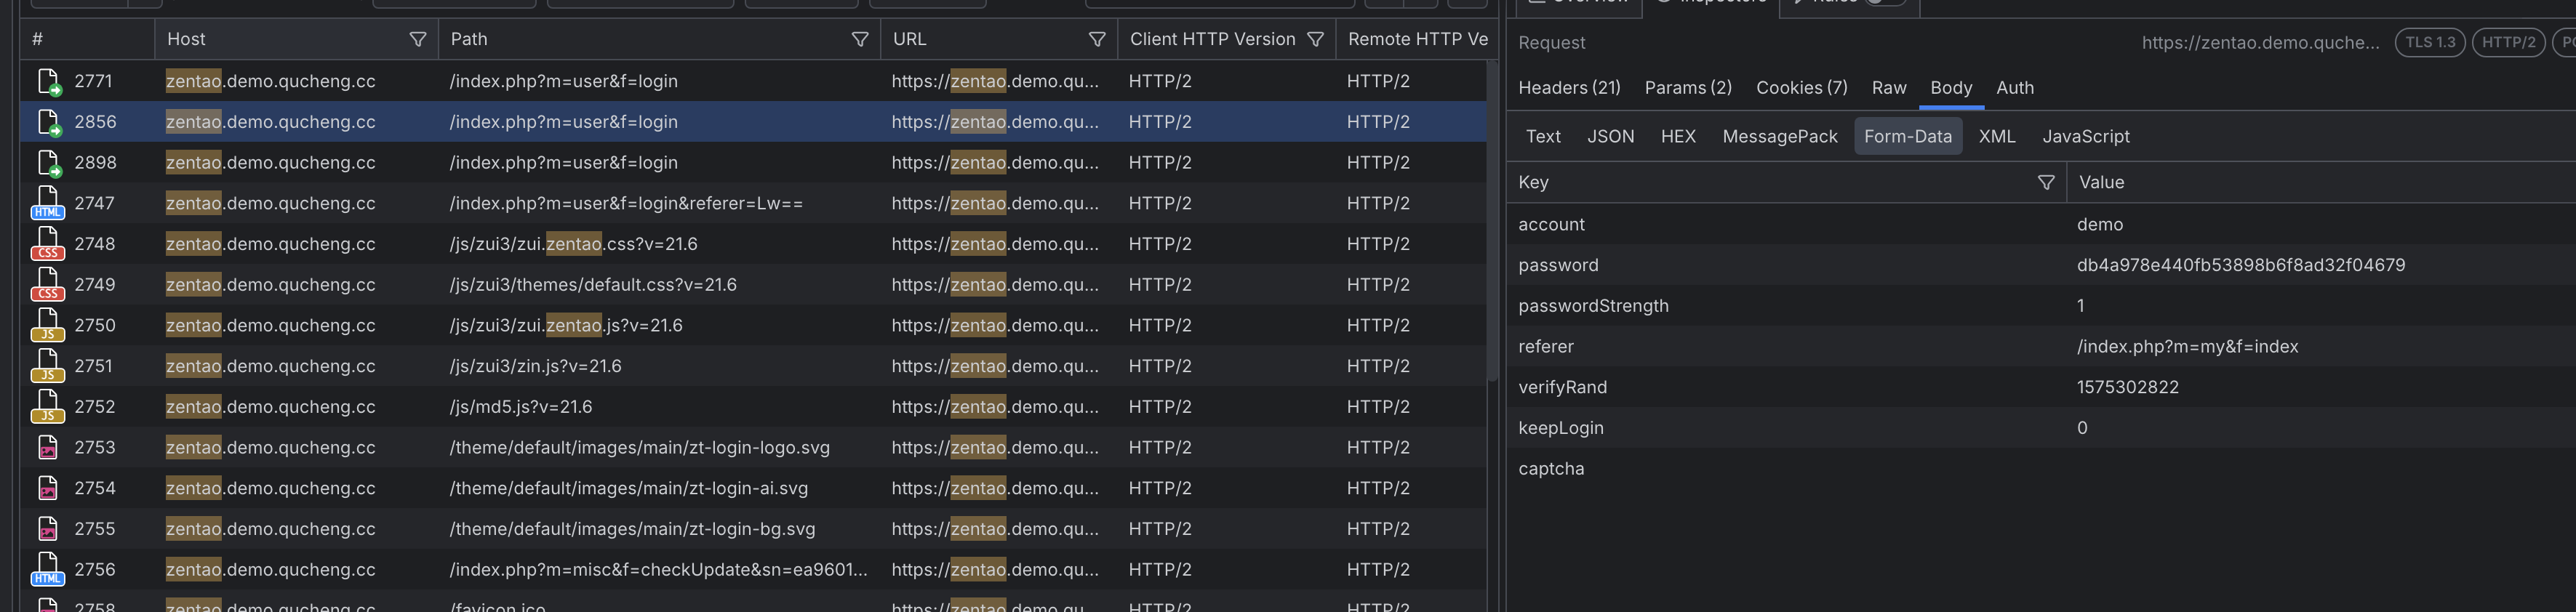
点击登录后,通过fiddler抓包即可发现两次登录的值不一样,说明被加密了,每次加密的数值会发生变化,这就造成了当前抓取的密码不能用到下一次请求中
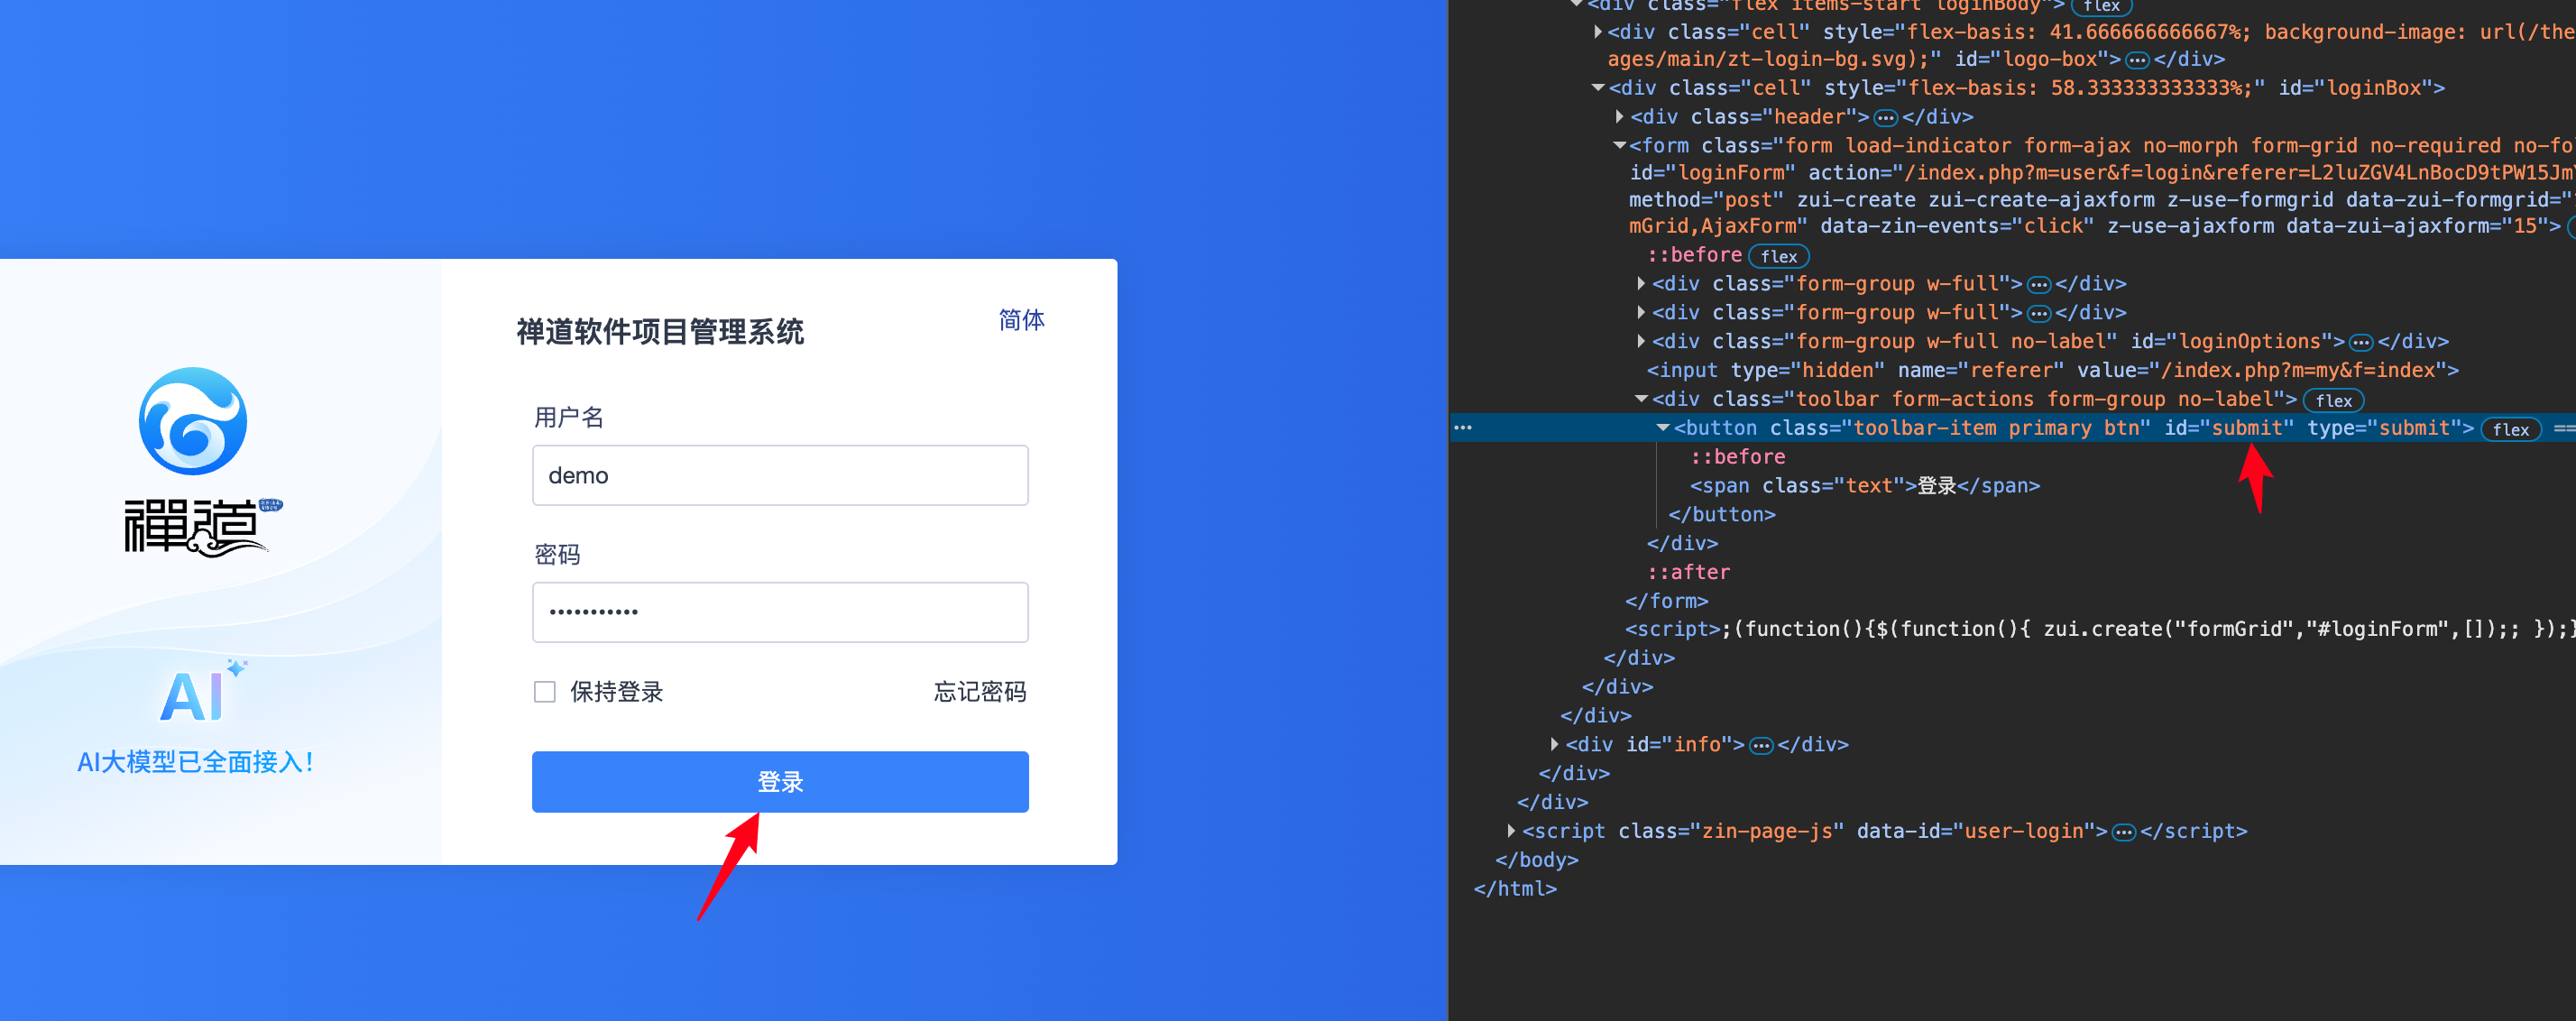
1.通过网页登录的 JavaScript 破解禅道登录
既然要获取密码的加密值,我们就需要搞定前端页面的密码加密逻辑,这需要有一点 js 的前端基础,否则比较难理解
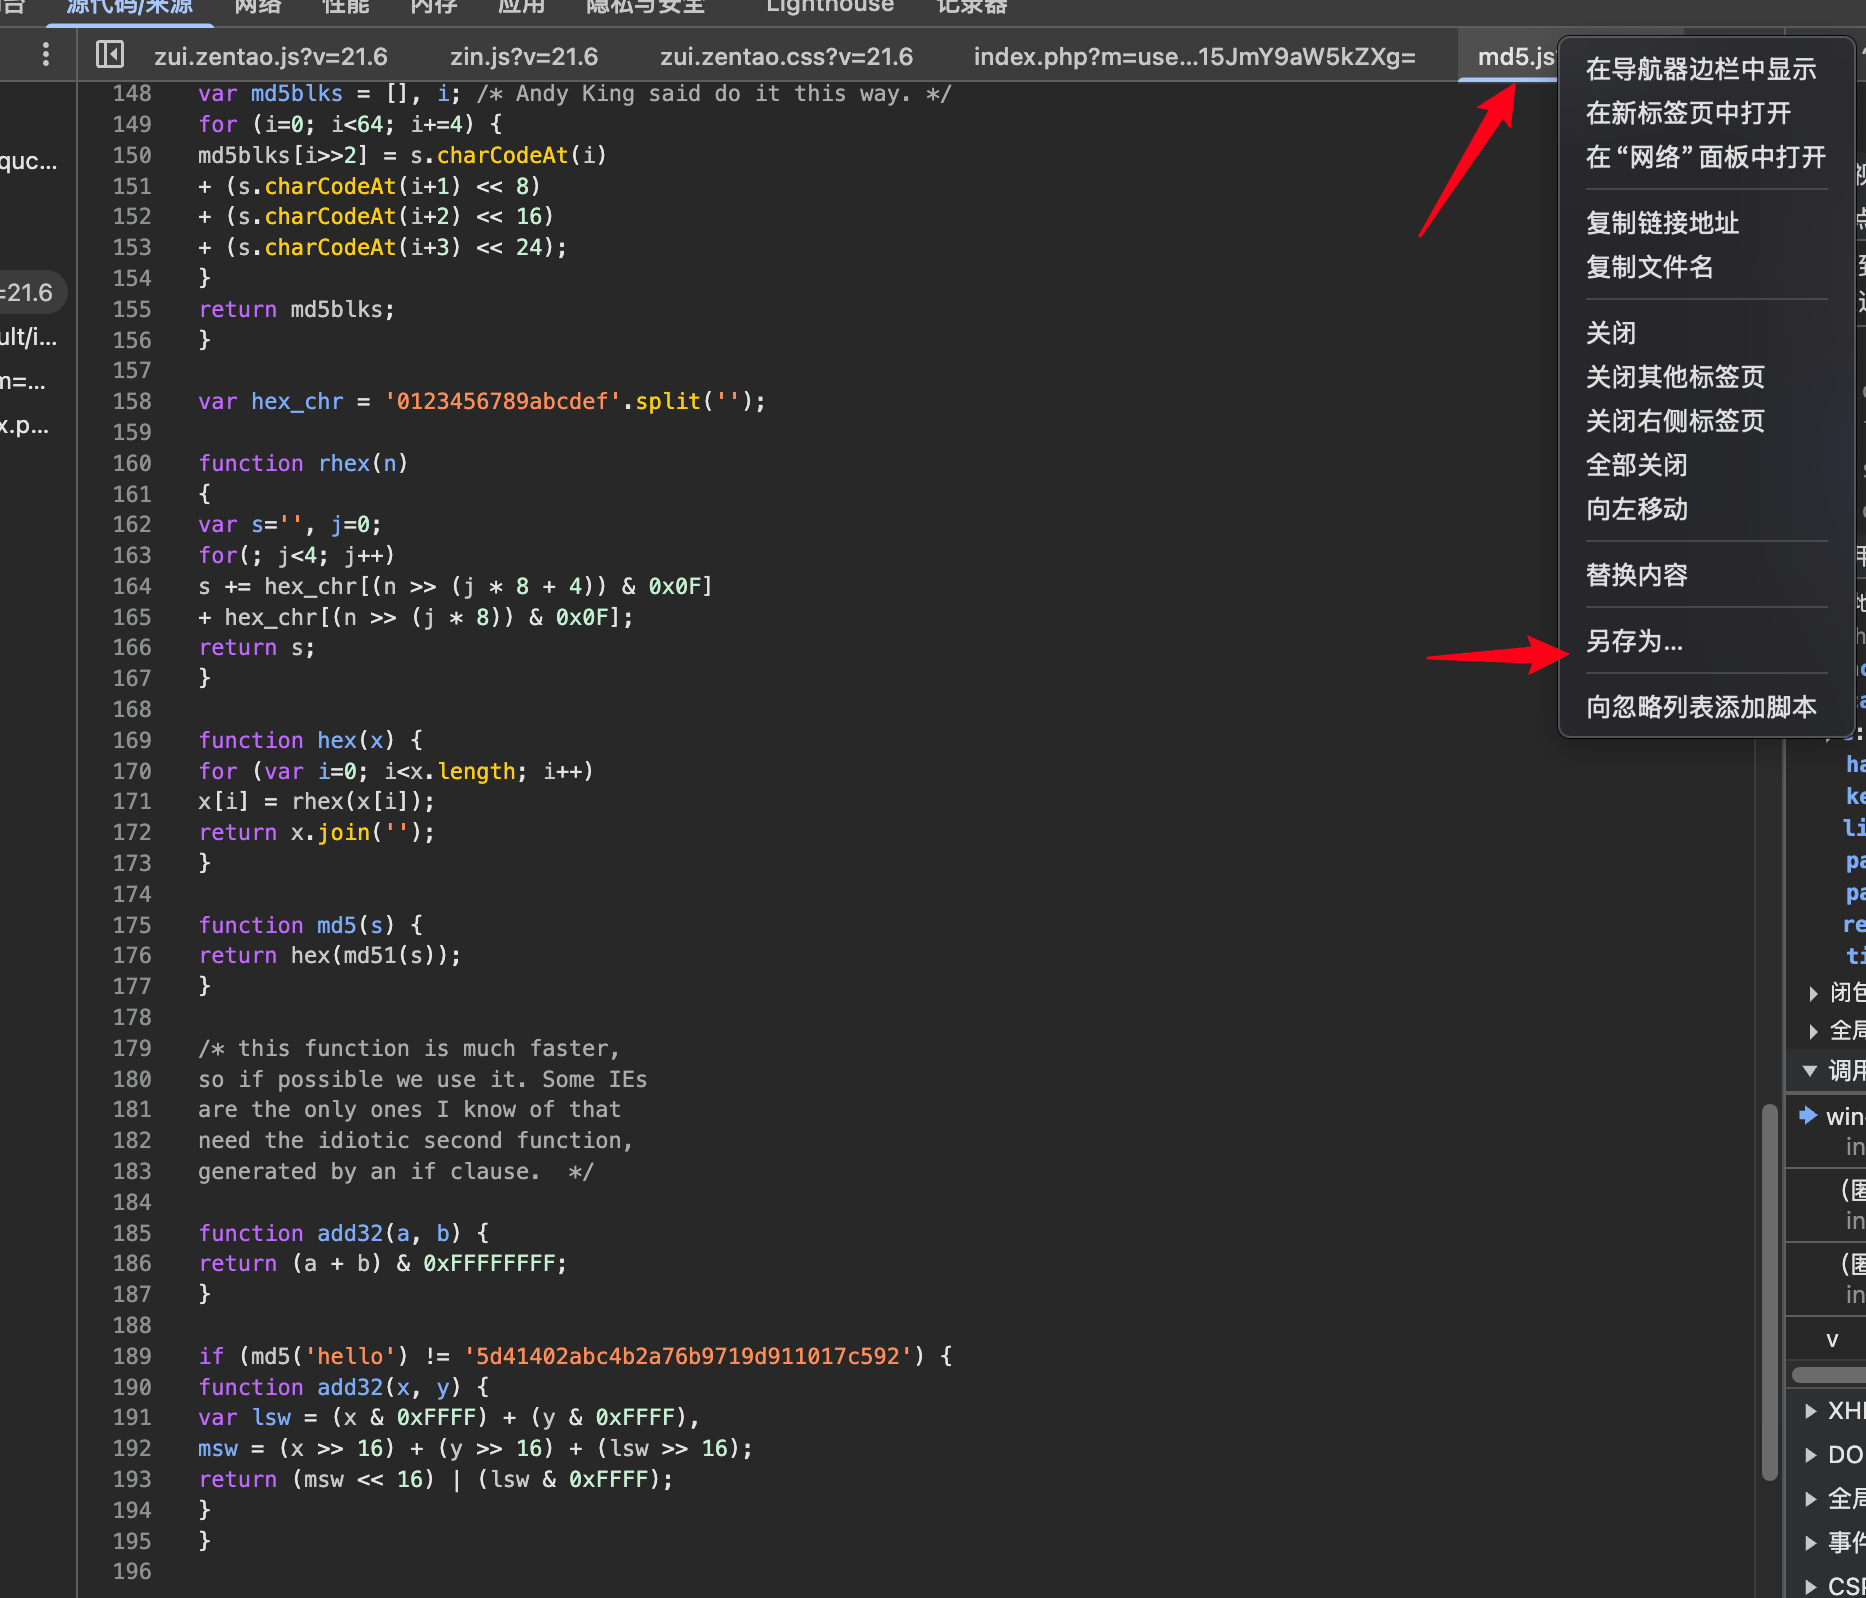
首先,通过点击登录,找到对应 js 文

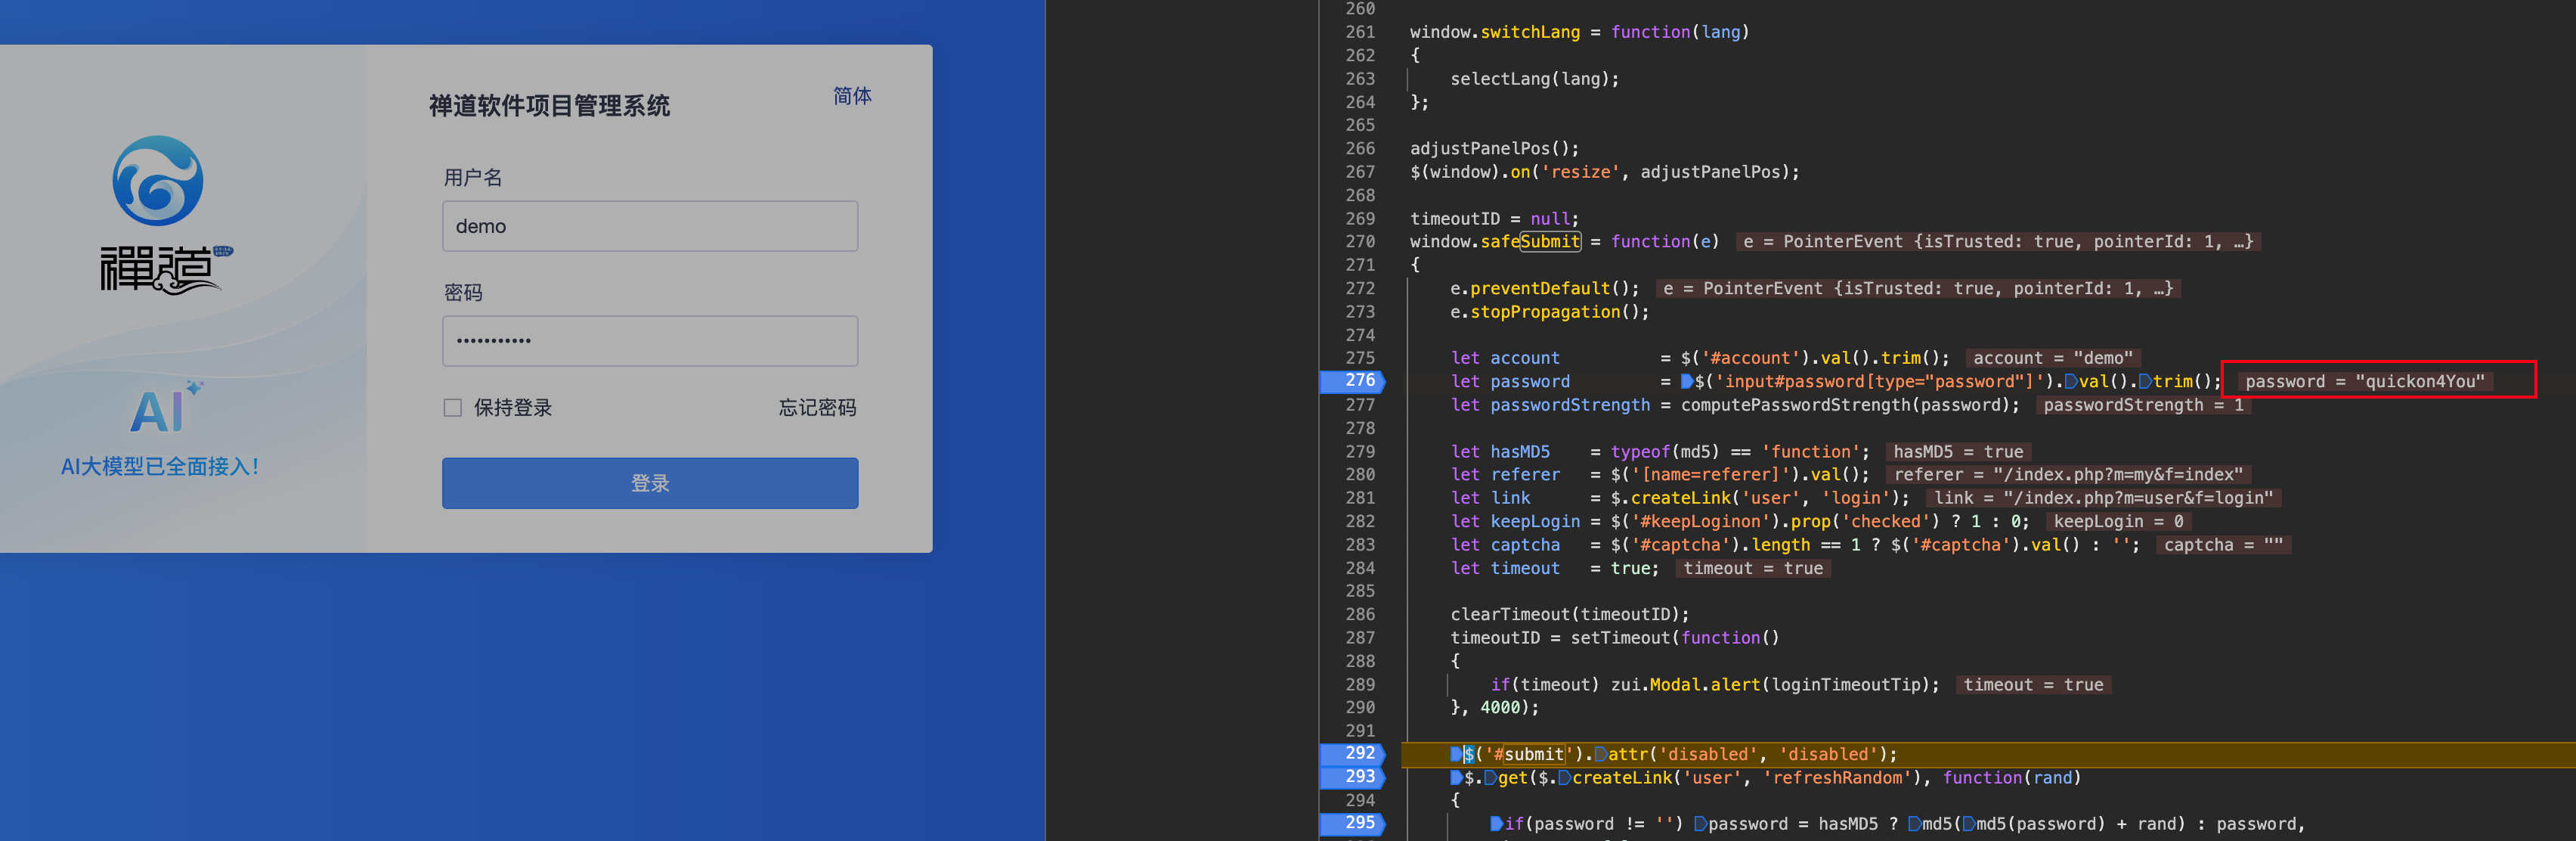
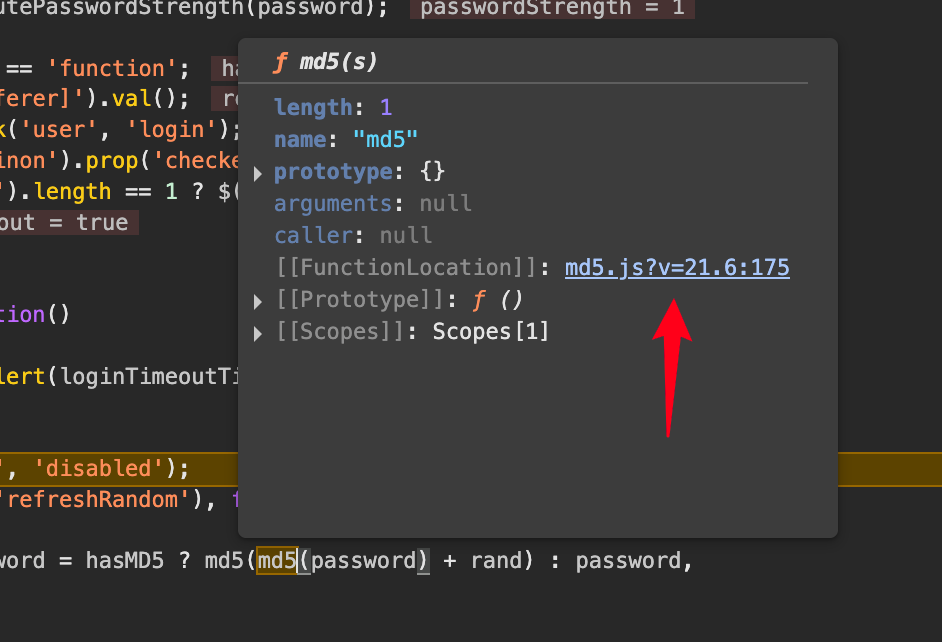
接着找到js 对密码的加密逻辑
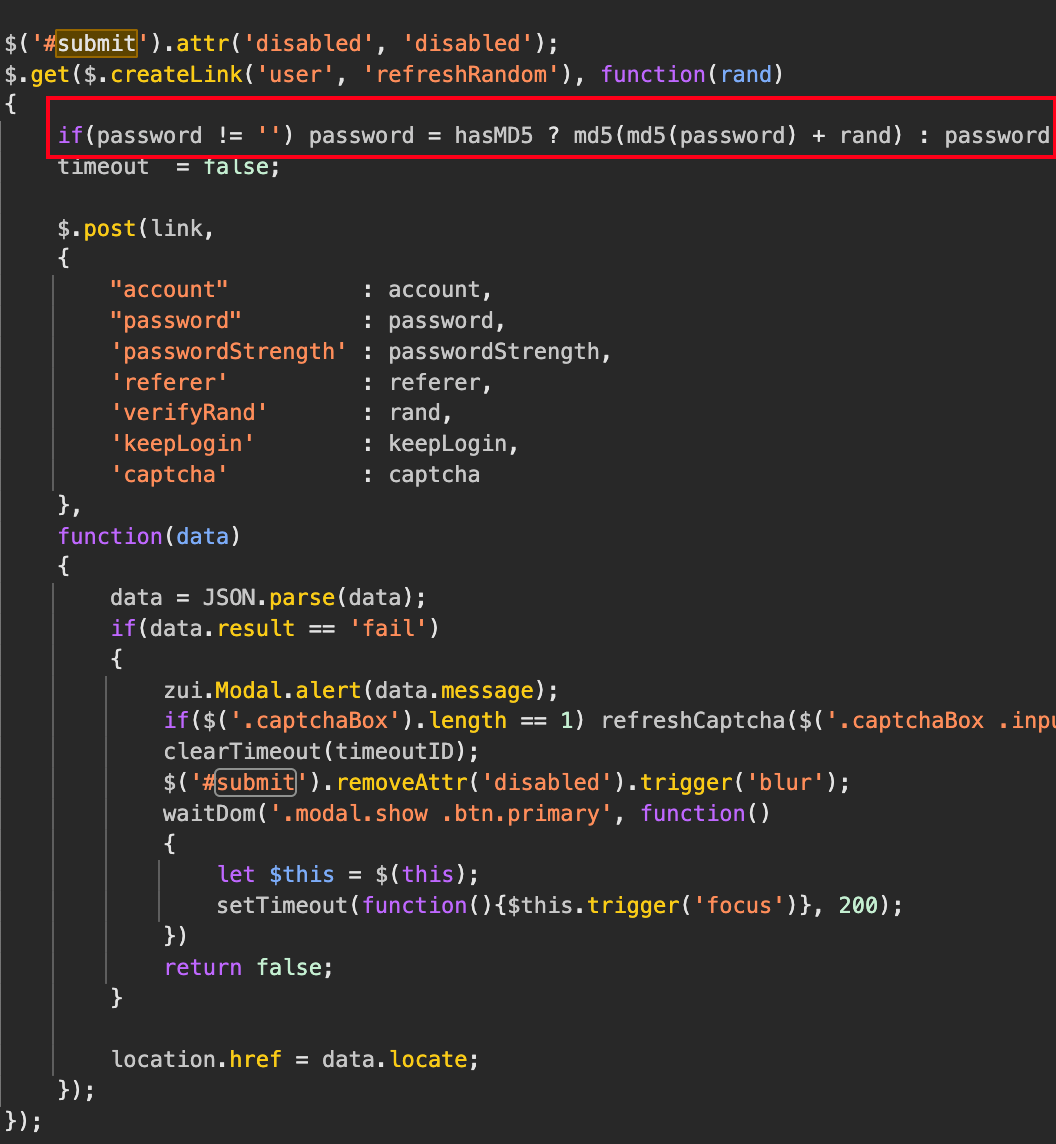 md5(md5(password) + rand):这是一个双重MD5加密加盐的过程:
首先对原始密码进行一次MD5哈希(md5(password))。
然后将第一次哈希的结果与一个随机值 rand 拼接(+ rand)。
最后对拼接后的字符串再进行一次MD5哈希(md5(...))
然后获取password真实值
通过抓包,找到rand值

#获取rand
rand_url = 'https://zentao.demo.qucheng.cc/index.php?m=user&f=refreshRandom'
header_rand = {
    "user-agent": "Mozilla/5.0 (Macintosh; Intel Mac OS X 10_15_7) AppleWebKit/537.36 (KHTML, like Gecko) Chrome/138.0.0.0 Safari/537.36",
    "referer": "https://zentao.demo.qucheng.cc/index.php?m=user&f=login&referer=L2luZGV4LnBocD9tPW15JmY9aW5kZXg=",
    "x-requested-with": "XMLHttpRequest"
}
res_rand = requests.get(rand_url, headers=header_rand,cookies=d)
print(res_rand.text)
保存网页对应的md5加密文件,引用到本地
调用js文件的py:
若要获取随机加密的密码,我们需要用python实现一遍js的加密逻辑,我们上面已经理清楚了密码是如何加密的,我们可以按照js的逻辑来用python实现。
先封装一个python执行js方法的类,用于调用js文件中的md5方法:需要先安装模块:pip3 insta11 PyExecJs
import execjs
import os


rootPath = os.path.dirname(__file__)
jsPath = os.path.join(rootPath, "md5.js")


class ExecJs(object):

    _instance = False

    def _get_js(self, name):
        js_str = ''
        with open(name, 'r', encoding="utf-8") as f:
            line = f.readline()
            while line:
                js_str = js_str + line
                line = f.readline()
        return js_str

    def get_encrypt_pwd(self, function, *args):
        ctx = execjs.compile(self._get_js(jsPath))
        return ctx.call(function, *args)
对密码进行两次加密+rand
#调用js
password =  'quickon4You'
from encrypt import ExecJs
e = ExecJs()
s1 = e.get_encrypt_pwd('md5',password)
s2 = e.get_encrypt_pwd('md5',s1 + res_rand.text)
2.问题排查
以上问题解决完后,发现还是访问不了接口,通过排查,发现登录的时候会传一个cookies进去:
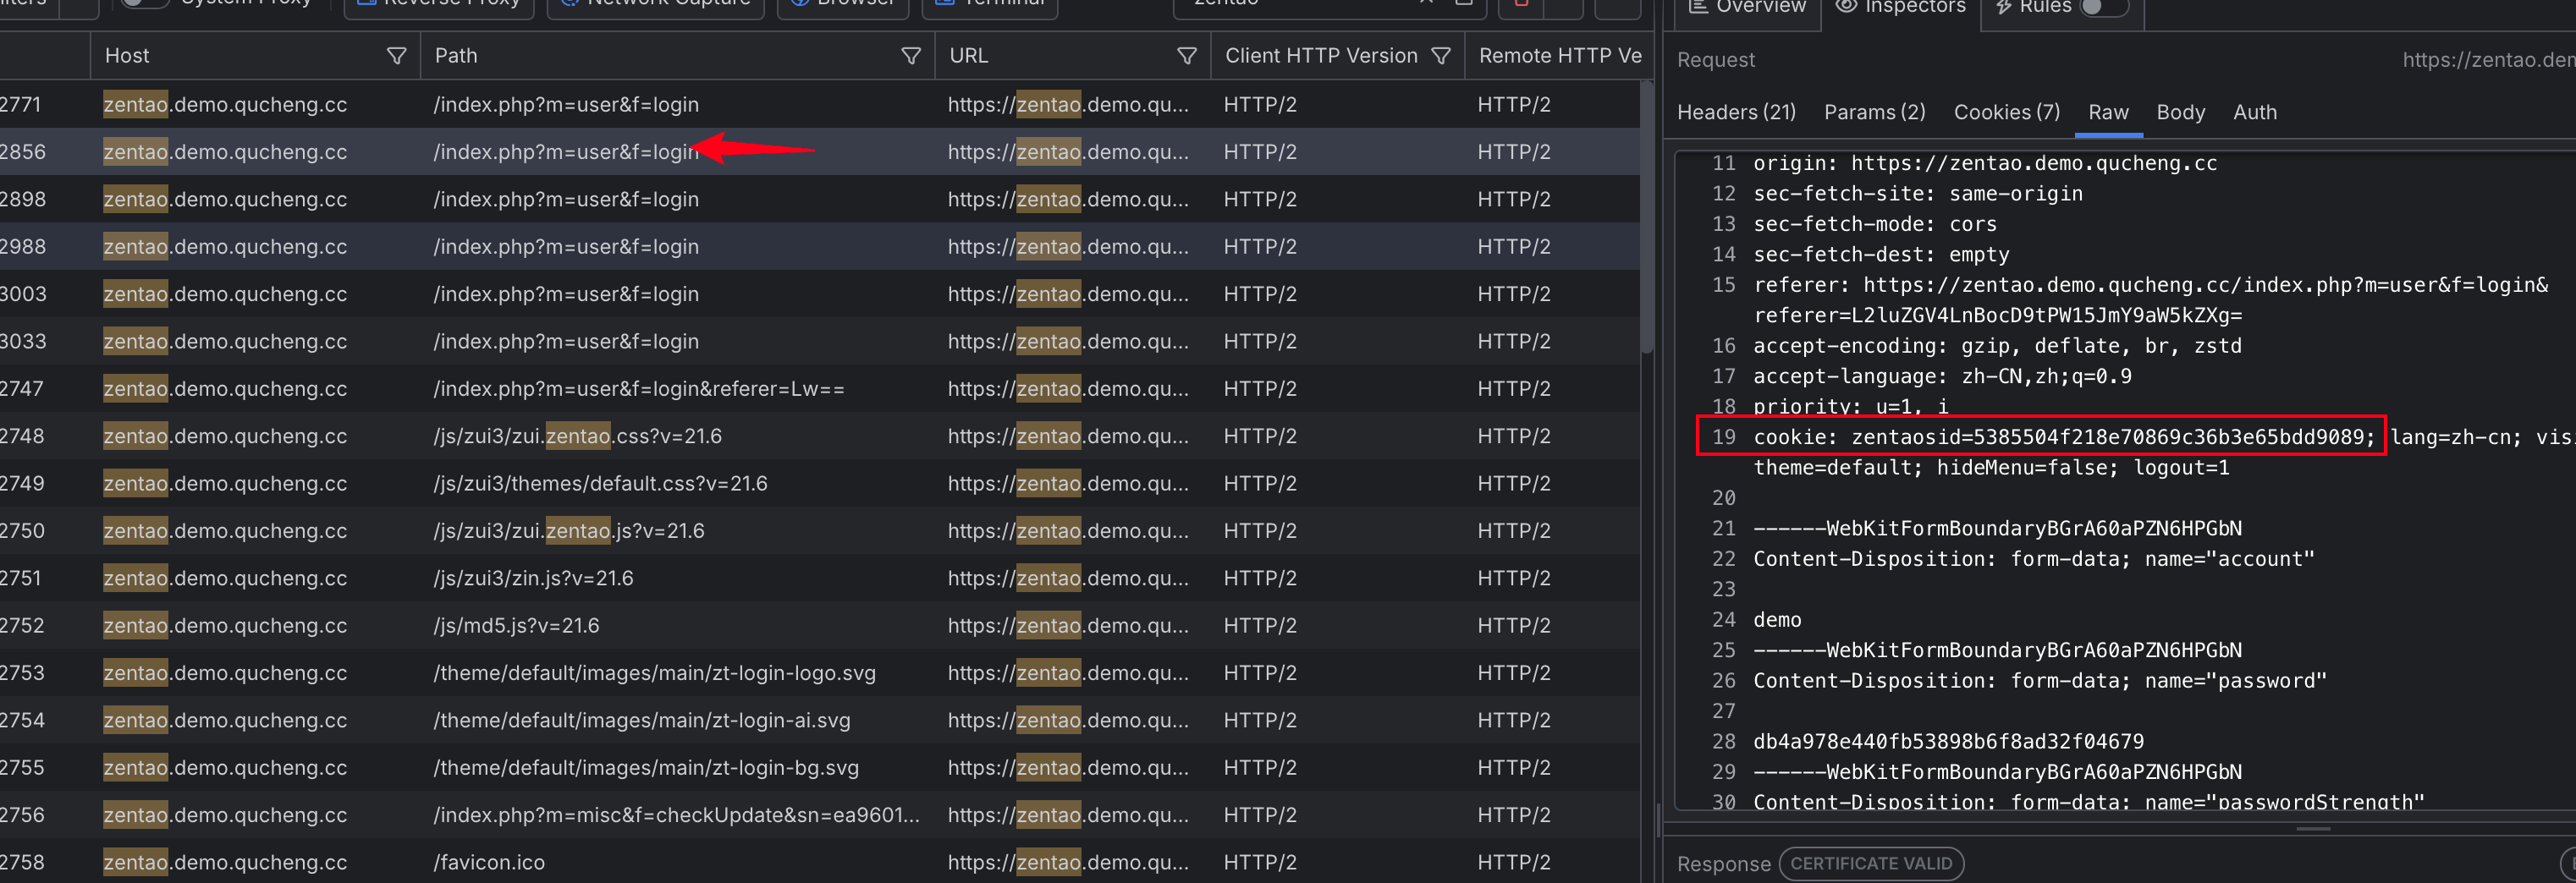
然后发现另外一个接口会 响应一个 cookie:
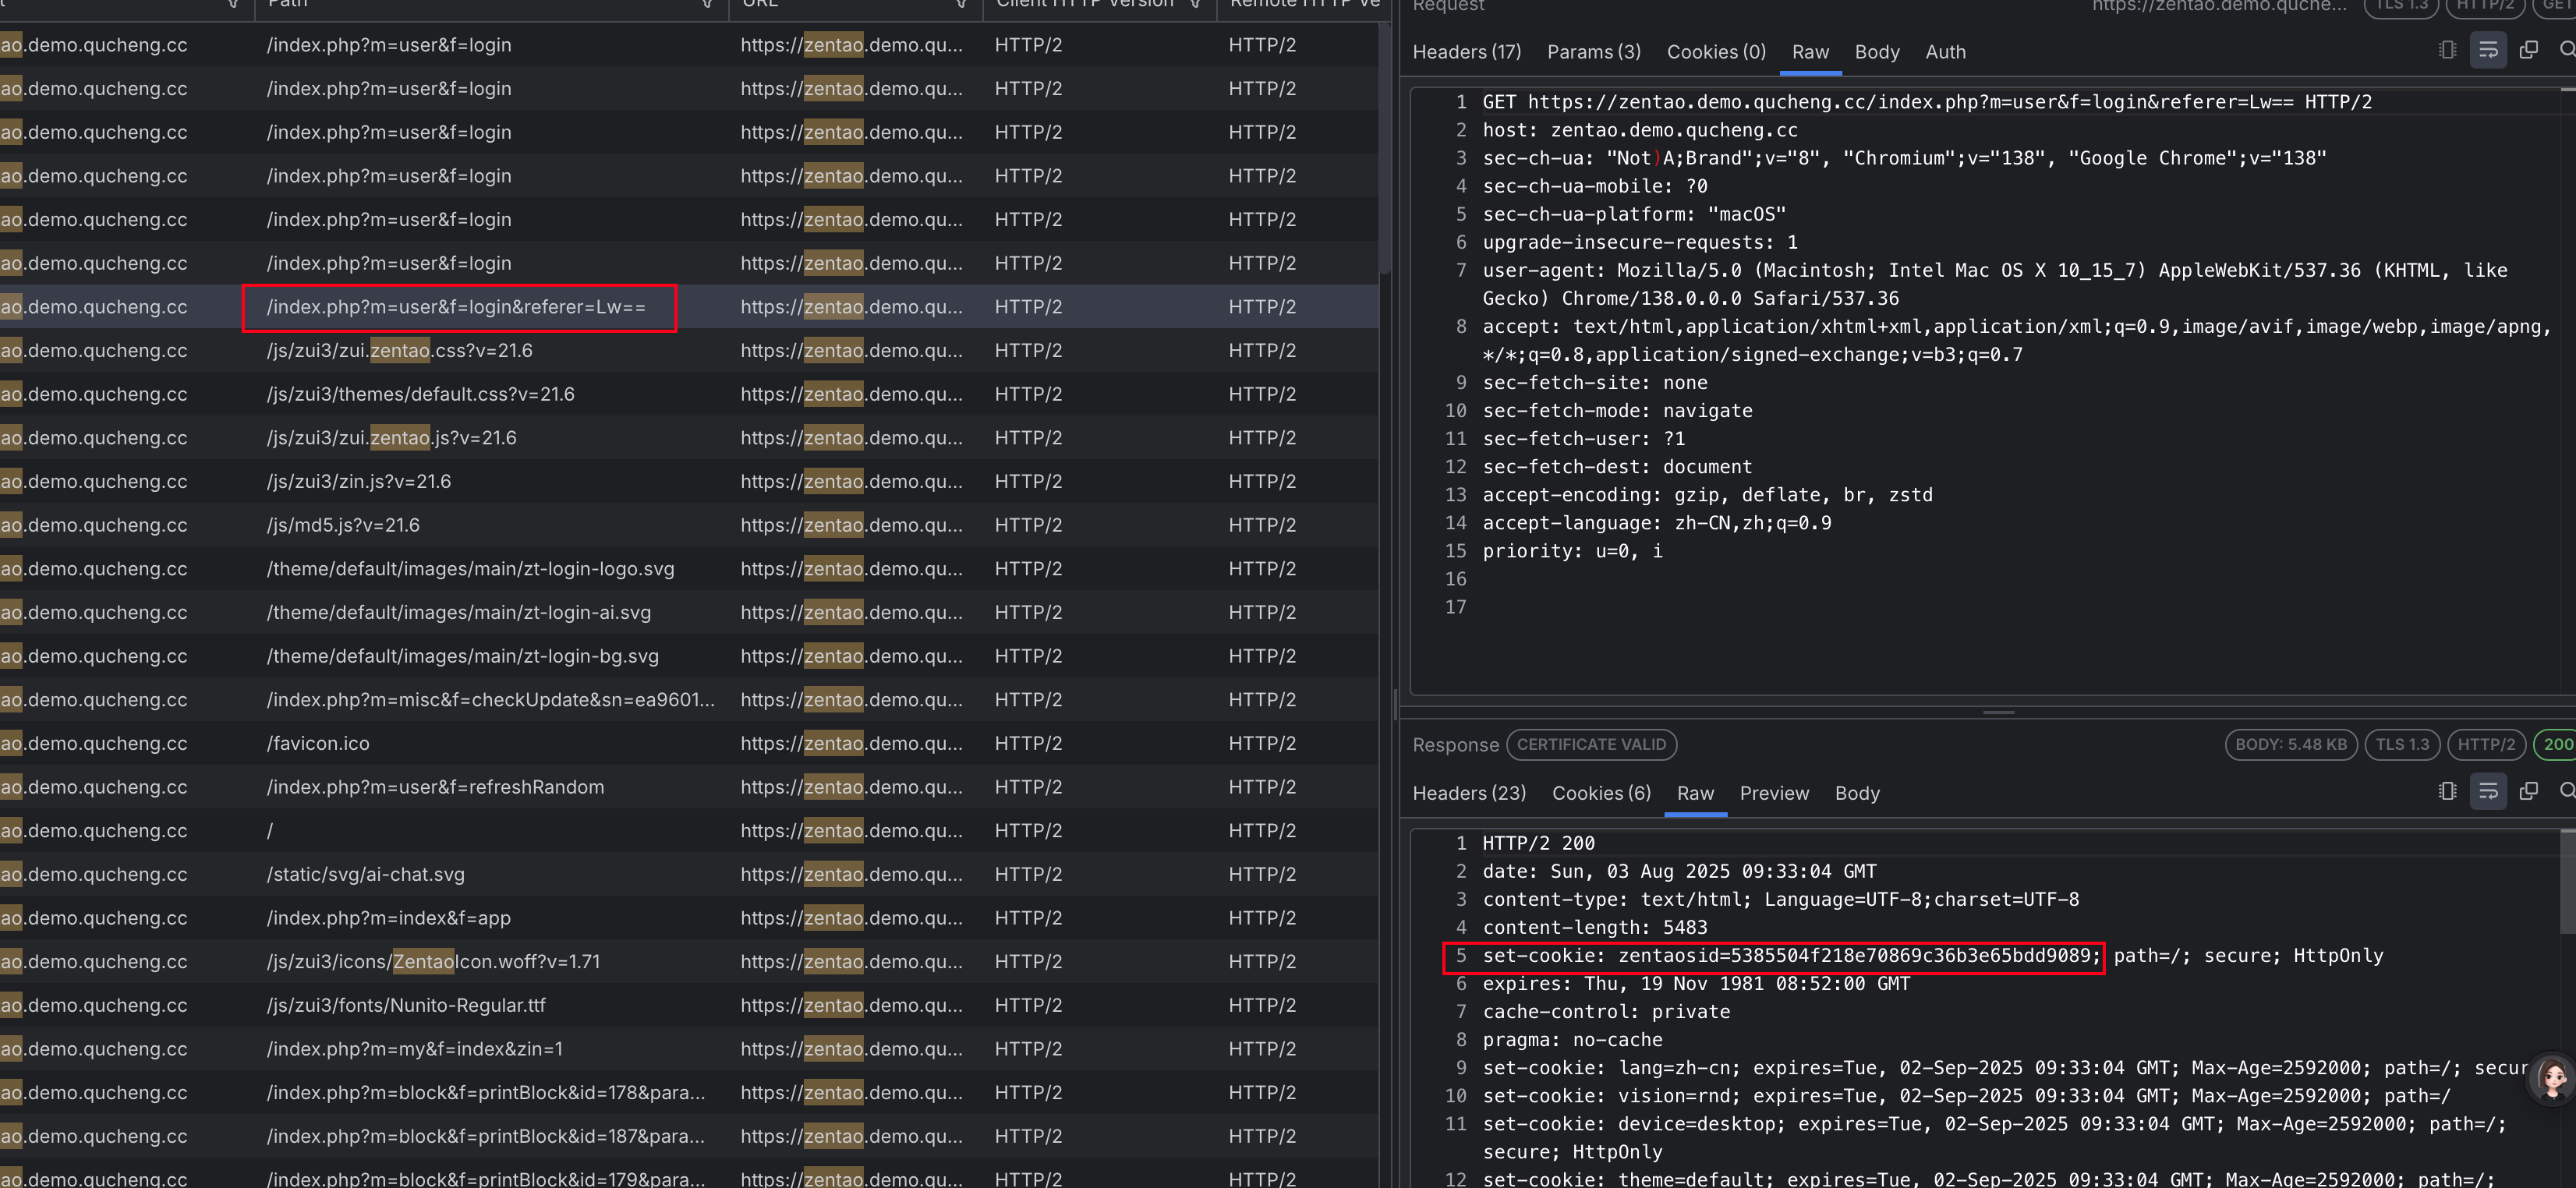 这个时候,我们就要获取到 cookie 值,然后传给 post
#获取cookie
url_cookie = 'https://zentao.demo.qucheng.cc/index.php?m=user&f=login&referer=Lw=='
header_cookie = {
    "user-agent": "Mozilla/5.0 (Macintosh; Intel Mac OS X 10_15_7) AppleWebKit/537.36 (KHTML, like Gecko) Chrome/138.0.0.0 Safari/537.36",
}
res_cookie = requests.get(url_cookie, headers=header_cookie)
d = requests.utils.dict_from_cookiejar(res_cookie.cookies) #将 requests 请求返回的 CookieJar 对象转换为 Python 字典格式,便于后续操作或存储。
完整代码:
#禅道登录

#1.MD5加密逻辑:md5(md5(password)+rand())
#2.password : quickon4You
import requests


#获取cookie
url_cookie = 'https://zentao.demo.qucheng.cc/index.php?m=user&f=login&referer=Lw=='
header_cookie = {
    "user-agent": "Mozilla/5.0 (Macintosh; Intel Mac OS X 10_15_7) AppleWebKit/537.36 (KHTML, like Gecko) Chrome/138.0.0.0 Safari/537.36",
}
res_cookie = requests.get(url_cookie, headers=header_cookie)
d = requests.utils.dict_from_cookiejar(res_cookie.cookies)
print(d)

#获取rand
rand_url = 'https://zentao.demo.qucheng.cc/index.php?m=user&f=refreshRandom'
header_rand = {
    "user-agent": "Mozilla/5.0 (Macintosh; Intel Mac OS X 10_15_7) AppleWebKit/537.36 (KHTML, like Gecko) Chrome/138.0.0.0 Safari/537.36",
    "referer": "https://zentao.demo.qucheng.cc/index.php?m=user&f=login&referer=L2luZGV4LnBocD9tPW15JmY9aW5kZXg=",
    "x-requested-with": "XMLHttpRequest"
}
res_rand = requests.get(rand_url, headers=header_rand,cookies=d)
print(res_rand.text)

#调用js
password =  'quickon4You'
from encrypt import ExecJs
e = ExecJs()
s1 = e.get_encrypt_pwd('md5',password)
s2 = e.get_encrypt_pwd('md5',s1 + res_rand.text)

url = 'https://zentao.demo.qucheng.cc/index.php?m=user&f=login'

data = {
    "account":"demo",
    "password":s2,
    "passwordStrength":"0",
    "referer":"/",
    "verifyRand":res_rand.text,
    "keepLogin":"1",
    "captcha":"",

}

header = {
    "host": "zentao.demo.qucheng.cc",
    "content-length": "765",
    "sec-ch-ua-platform": "macOS",
    "x-requested-with": "XMLHttpRequest",
    "user-agent": "Mozilla/5.0 (Macintosh; Intel Mac OS X 10_15_7) AppleWebKit/537.36 (KHTML, like Gecko) Chrome/138.0.0.0 Safari/537.36",
    "sec-ch-ua": 'Not)A;Brand;v="8", Chromium;v="138"',
    "sec-ch-ua-mobile": "?0",
    "accept": "*/*",
    "origin": "https://zentao.demo.qucheng.cc",
    "sec-fetch-site": "same-origin",
    "sec-fetch-mode": "cors",
    "sec-fetch-dest": "empty",
    "referer": "https://zentao.demo.qucheng.cc/index.php?m=user&f=login&referer=Lw==",
    "accept-encoding": "gzip, deflate, br, zstd",
    "accept-language": "zh-CN,zh;q=0.9",
    "priority": "u=1, i",
}


res4 = requests.post(url,data=data,headers=header,cookies=d)
print(res4.text)
3.实践总结
禅道对请求头要求比较高,尽量传满,否则还是会报错
该禅道示例地址的 content-type 会多了一个boundary的随机值,这个字段传少了依旧访问不了
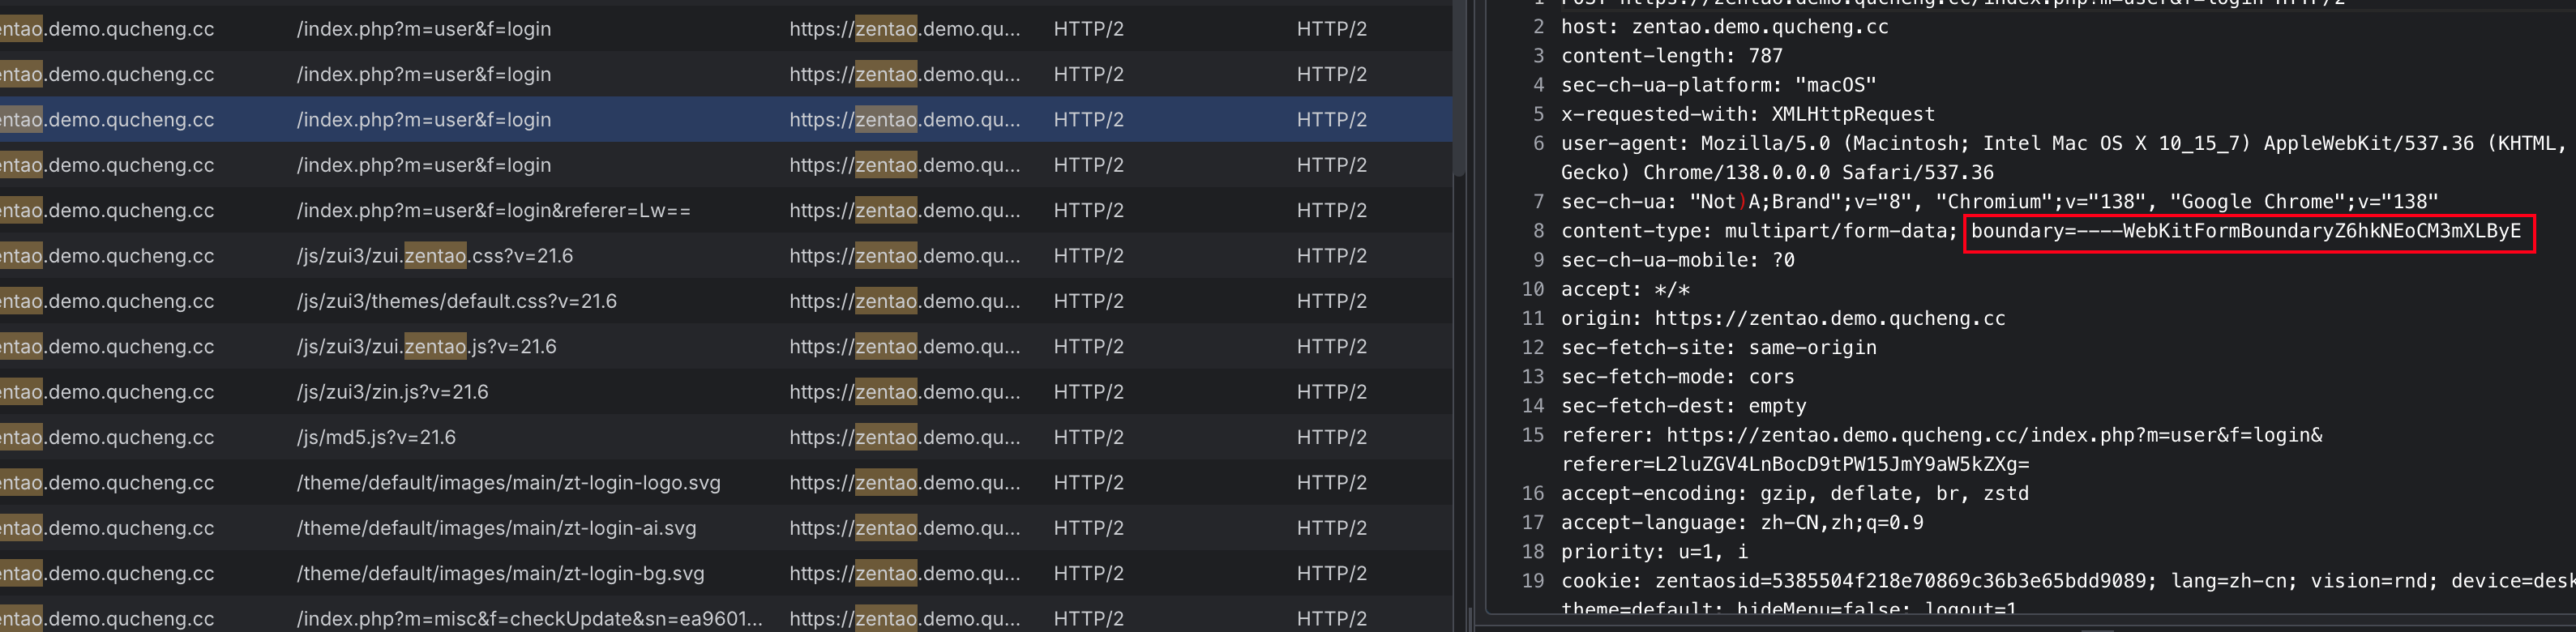
解决方法:在传请求头的时候,直接去掉content-type的传入,大多数 HTTP 客户端库(如 Python 的 requests、Java 的 REST Assured)或测试工具(如 Postman、JMeter)在发送 multipart/form-data 请求时,会自动生成 boundary 并添加到请求头中,无需手动指定